Meta Description: Learn how to check shock absorber health from the experts. This guide covers visual, bounce, and road test inspections. Ensure your vehicle’s safety and performance by knowing the signs of wear. #shockabsorber #suspension #autorepair
Introduction
As engineers and manufacturers of shock absorbers, we often engage in discussions about their function, but a critical conversation that precedes that is how to identify their need for replacement. Every component on a vehicle has a service life, and our job is not just to produce durable products but to empower vehicle owners with the knowledge to recognize when that life is coming to an end. This leads to the fundamental question: how to check shock absorber performance safely and accurately.
Many drivers operate under the misconception that shock absorbers are for ride comfort alone. While they certainly play a significant role in damping road imperfections, their primary function is far more critical: to maintain tire contact with the road. Properly functioning shock absorbers are a cornerstone of vehicle safety, directly influencing braking distance, stability during cornering, and control over uneven surfaces. Worn shocks can turn a minor swerve into a loss of control and can double your stopping distance in wet conditions. Therefore, knowing how to check shock absorber health is not optional; it is an essential part of responsible vehicle ownership.
This guide is not a collection of old wives’ tales. It is a detailed, methodical approach designed by those who understand these components inside and out. We will move beyond simple assumptions and provide you with a comprehensive diagnostic procedure that utilizes visual inspection, physical testing, and a real-world road evaluation. By following these steps, you will be able to determine the precise health of your shock absorbers, make an informed decision about maintenance, and ensure that your vehicle remains as safe and responsive as the day it left the assembly line. This is the definitive guide on how to check shock absorber condition from the source.
Core Content
Section 1: The Visual Inspection: The First Step in Learning How to Check Shock Absorber
The most accessible method for learning how to check shock absorber condition is a thorough visual inspection. This initial assessment requires no special tools and can reveal a wealth of information before you even put a hand on the vehicle. A component’s external appearance often tells a detailed story of its internal health. As shock absorbers wear, they leak fluid, sustain physical damage, and show signs of stress that directly impact performance.
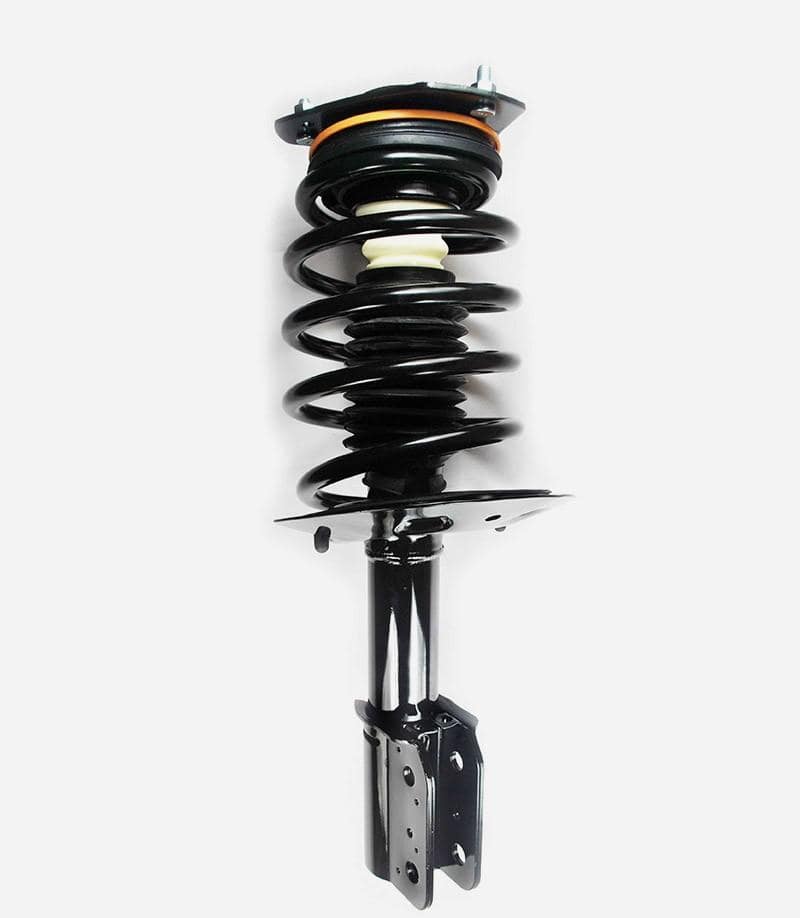
1. Locating the Shock Absorbers: Before you can learn how to check shock absorber health, you must first locate them. On most vehicles, there are typically four shock absorbers, one at each corner of the vehicle. A front-wheel-drive car will have one at each front wheel, mounted inside the coil spring (as part of a MacPherson strut assembly) or alongside the lower control arm. Rear shock absorbers are generally located at the rear wheels, sometimes mounted vertically, and sometimes horizontally inside the vehicle along the trunk floor or integrated with the rear coil springs. SUVs and trucks often have larger, more robust units due to increased weight and stress.
2. Checking for Leaks (The Primary Indicator of Wear): The most common and definitive sign of a failing shock absorber is an external oil leak. The internal valving of a shock absorber relies on precise hydraulic fluid to dampen motion. Over time, the internal seals, most notably the rod guide, wear out. This allows pressurized fluid to seep past the piston rod and drip down the body of the shock absorber.
- What to Look For: When learning how to check shock absorber leaks, look for wet, oily residue or clear drips running down the shock’s body from the top where the rod exits. This “weeping” is normal to a very small degree as the rod cycles and lubricates the seal. However, a significant, continuous film of oil or active dripping is a clear red flag.
- Oil Trail Analysis: The fluid may run down the body and pool on the dust boot at the bottom. Check the boot for saturation. A soaked boot indicates a chronic leak.
- Key Takeaway: A leaky shock absorber has lost its damping ability. The fluid loss directly translates to a loss of performance, making this a critical point of failure to learn how to check shock absorber for.
3. Inspecting for Physical Damage: Shock absorbers are mounted on the underside of a vehicle, making them vulnerable to all manner of road hazards. Physical damage can compromise their structural integrity and render them ineffective, regardless of their internal condition.
- Dents and Cracks: Run your hand along the body of the shock absorber (carefully, as it may be hot or dirty). Feel for significant dents or cracks. A severe dent can damage the internal cylinder, while a crack can lead to catastrophic failure under high pressure.
- Bent Rods: Inspect the shiny chrome-plated piston rod, especially where it exits the top seal. Look for any signs of bending, pitting, or corrosion. A bent rod will cause uneven internal valving and can damage the rod guide seal, accelerating wear and leak.
- Broken or Damaged Mounts: Check the top and bottom mounting points where the shock absorber attaches to the vehicle’s chassis or control arms. Look for any cracks in the mounting brackets, loose mounting hardware (nuts and bolts), or damaged rubber bushings. A loose or broken mount will cause a clunking noise and prevent the shock from doing its job effectively.
4. Examining the Dust Boot and Bushings: Every shock absorber has protective components designed to seal out dirt and debris.
- The Dust Boot: This is a rubber bellows at the top of the shock that seals around the piston rod. Check for any rips, tears, or splits. A compromised dust boot allows abrasive road grime to enter the shock absorber, which will rapidly destroy the internal piston seals and cylinder walls, leading to premature failure. This is a vital component to inspect when you learn how to check shock absorber integrity.
- The Bushings: The rubber or polyurethane components at the top and bottom mounts isolate shock absorber noise and vibration. Look for cracking, sagging, or disintegration of these bushings. Worn bushings contribute to a noisy, clunky ride and affect geometry.
Section 2: The Physical “Bounce Test”: An Active Approach on How to Check Shock Absorber
Once you’ve completed a visual inspection, the next step in learning how to check shock absorber performance is a dynamic physical test. The “bounce test” is a classic method that provides a direct, hands-on assessment of the shock absorber’s ability to control suspension movement. This test simulates the constant up-and-down motion a shock absorber experiences on the road.
1. How to Perform the Bounce Test:
- Location: Position yourself at one corner of the vehicle (for example, the front passenger side).
- Action: With your foot or the palm of your hand, press down firmly and quickly on the corner of the car, depressing the suspension about 2-3 inches.
- Release: Let go abruptly.
2. Interpreting the Results: The Science of How to Check Shock Absorber Function The most important factor in learning how to check shock absorber with this method is observing how the vehicle reacts. The goal of a good shock absorber is to control the spring’s oscillation.
- Healthy Shock Absorber: A vehicle with a fully functional set of shock absorbers should return to its normal ride height and stop moving almost immediately. You may get one, and at most two, small bounces. The suspension compresses and rebounds with controlled, damped motion.
- Worn-Out Shock Absorber: If the corner of the car continues to bounce up and down more than two or three times, this is a clear and unmistakable sign that the shock absorber at that corner is worn out and has lost its damping capacity. It is unable to control the energy of the compressed spring, leading to oscillation. This is the essence of learning how to check shock absorber performance through observation.
3. A Critical Note on Uneven Wear: The bounce test is most effective for identifying a specific worn shock. Perform the test on all four corners and compare the results. If one corner bounces significantly more than the others, you have found your culprit. However, it’s also common for all four shock absorbers to wear down at a similar rate, in which case the bounce test will show excessive movement at all four corners. This comparative analysis is a key skill to master when you learn how to check shock absorber health across the entire vehicle.
Section 3: The Road Test: The Real-World Verification of How to Check Shock Absorber
Ultimately, the true test of how to check shock absorber performance is conducted on the road. This is where the theoretical knowledge gained from visual and physical inspection is validated in real-world conditions. Pay close attention to your vehicle’s handling as you drive. Specific behaviors are direct indicators of shock absorber deterioration.
1. Brake Dive: When you apply the brakes, the vehicle’s weight shifts forward. The shock absorbers are designed to control this transfer of weight, keeping the front end from diving excessively. As you learn how to check shock absorber, note how the car behaves under braking. With worn shocks, the front end will dip noticeably and take longer to return to its normal height, compromising stability and increasing stopping distance.
2. Acceleration Squat: This is the opposite of brake dive. When you accelerate, the vehicle’s weight shifts to the rear. With worn rear shock absorbers, the rear of the car will “squat” or dip down significantly. This unsettles the car and can reduce traction at the front wheels.
3. Body Roll During Cornering: Shock absorbers work with the anti-roll bars to minimize body roll. When they are worn, the vehicle will lean excessively in corners. This is a safety concern, as it reduces tire grip and can make the vehicle feel unstable and less responsive to steering inputs. A noticeable increase in body roll is a key sign to look for when learning how to check shock absorber function.
4. “Nose-Dipping” Over Bumps: This is a classic symptom of worn front shock absorbers. When you go over a speed bump or a pothole, the front suspension compresses and “nose-dives,” failing to rebound quickly enough. The front end may hit the bump hard, or continue to bounce after passing over it, rather than maintaining a controlled contact with the road.
5. Tail Wagging / Porpoising: Similar to nose-dipping, but affecting the rear. If the rear of your car feels like it’s bouncing up and down excessively after hitting bumps, your rear shock absorbers are likely worn. This is often referred to as “porpoising” and is a sign of poor rear-end stability.
6. Hydroplaning and Traction: This is a less obvious but critically important indicator. Worn shock absorbers cannot keep the tires planted on the road’s surface. This means that during hydroplaning events or when traversing rough, undulating roads, the tires are more likely to lose contact with the pavement. This leads to a significant loss of vehicle control. If your car feels “floaty” or skittish on certain road surfaces, it’s time to check your shock absorbers.
Summary: Your Comprehensive Strategy on How to Check Shock Absorber
Mastering how to check shock absorber health is a multi-faceted diagnostic process that combines observation, physical testing, and real-world evaluation. It is a fundamental skill for ensuring your vehicle’s safety and performance. We have broken down this process into three distinct, but interconnected, phases.
First, a thorough visual inspection is your starting point. Look for the tell-tale signs of oil leaks, physical dents or bent rods, and damaged mounting bushings or dust boots. These issues often point directly to internal component failure. Second, the physical bounce test provides a direct, empirical measurement of the shock absorber’s ability to control suspension oscillation. A vehicle that bounces more than twice is a clear indicator of a worn-out unit. Third, the road test confirms your suspicions by observing the vehicle’s behavior under dynamic conditions. Be vigilant for excessive brake dive, noticeable body roll in corners, and the unsettling sensation of nose-dipping or porpoising over bumps.
Understanding how to check shock absorber correctly is an investment in your safety and the longevity of your vehicle’s tires. By systematically applying these three methods, you move from being a passive passenger to an active, informed guardian of your vehicle’s mechanical health. Remember, knowing how to check shock absorber is the first, and most critical, step in ensuring that your shocks are ready to perform their vital function: keeping your tires firmly on the road.