Meta Description: Are shock absorbers easy to replace? As the factory engineers who build them, we provide a nuanced answer. DIY is possible for some, but a job fraught with complexity and risk. Our guide breaks down the reality, challenges, and crucial safety factors before you begin.
Introduction
For many car owners, the prospect of performing their own repairs is a point of pride and a significant cost-saving opportunity. Tutorials on YouTube forums make swapping out brake pads and changing oil seem simple, leading to a natural question for anyone facing worn-out shocks or struts: “Are shock absorbers easy to replace?” It’s a deceptively simple question, but as the manufacturers who spend our days perfecting these components—from the metallurgy of the shaft to the viscosity of the hydraulic fluid—we can tell you that a simple “yes” or “no” would do you a great disservice.
The shock absorber is one of the most misunderstood components in a car. Many call them “shock absorbers,” while others, particularly on the front of many FWD, RWD, and AWD vehicles, refer to the entire assembly as a “strut.” A strut is technically a combined unit that integrates the shock absorber with a coil spring and a steering knuckle. The difference between the two is critical in terms of complexity. The challenge with replacing these parts is not so much in the final bolting-in of the new component, but in the process of safely and correctly removing the old one. This process often involves managing hundreds, if not thousands, of pounds of stored spring energy and navigating a maze of suspension linkages.
In this definitive guide from the factory floor, we will dismantle the myth of the “easy” shock replacement. We will explore the factors that determine the difficulty level—from vehicle-specific engineering designs to the required tools and the necessary mechanical aptitude. We will walk you through the fundamental steps of the job, highlighting the critical pitfalls and potential dangers that await the unprepared. By the end, you will have a clear, honest, and comprehensive understanding of whether this job is right for you, or if it’s a task best left to the professionals. The goal is not to discourage DIY, but to empower you with the knowledge to make a safe and informed decision.
Core Content
Section 1: Beyond the Basics – Factors That Dictate Job Complexity
The complexity of a shock absorber or strut replacement is not one-size-fits-all. It varies dramatically from one vehicle to another, determined by a number of critical engineering factors. As the factory, we design our components to meet specific performance targets, and the vehicle manufacturers integrate them into a suspension system with its own unique set of challenges. Understanding these factors is the first step to answering the question of whether the job is “easy.”
1. Strut vs. Shock: The Single Biggest Variable The biggest determinant of difficulty is whether you are replacing a shock absorber or a strut assembly.
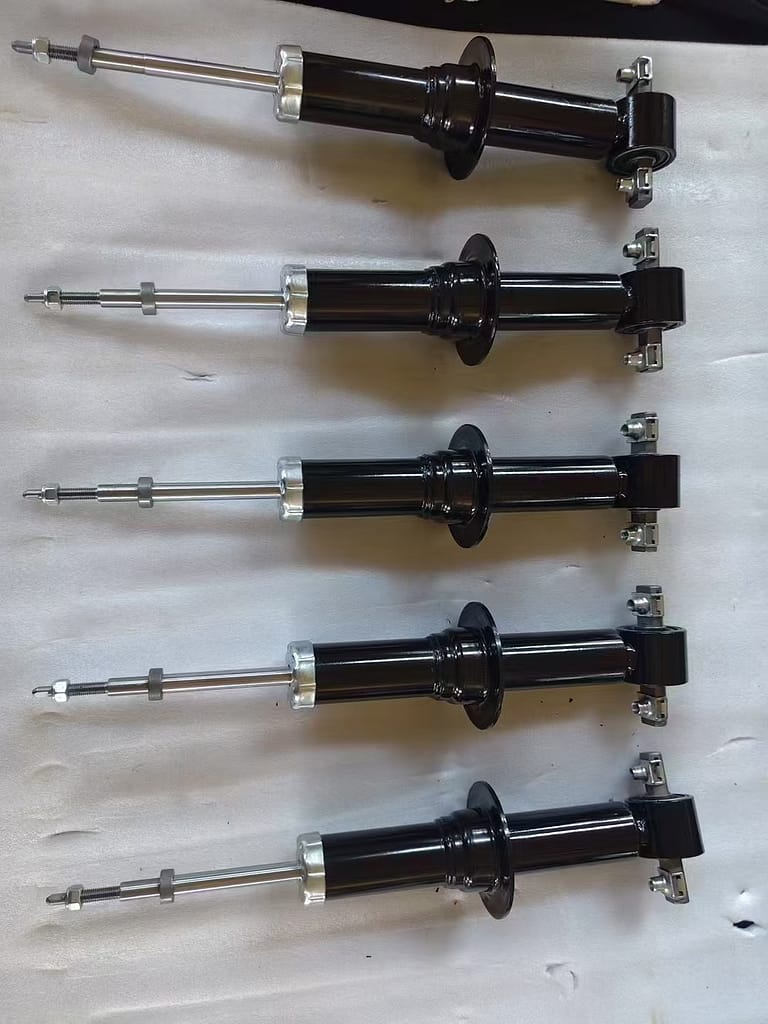
- Shock Absorber Replacement: Replacing a standalone shock absorber is generally considered a more accessible job for a skilled DIYer. These are often simple, bolt-in components found on the rear axle of many cars and on the front and rear of trucks and SUVs. The process involves unbolting the two mounting points (one at the top of the wheel well and one at the bottom) and replacing the unit. While still requiring proper tools and technique, it involves fewer integrated systems.
- Strut Assembly Replacement: Replacing a complete strut assembly is a far more complex undertaking. A strut assembly is a structural component that forms the upper pivot point for the wheel. It includes the shock, the spring, the coil seat, the bearing plate, and the steering knuckle. The primary challenge is the coil spring, which is under immense load from the vehicle’s weight and must be compressed using a specialized spring compressor before the strut can be disassembled. Incorrectly managed, a compressed coil spring can become a lethal projectile, capable of causing serious injury or death.
2. The Spring Compressor: The Point of No Return For any front-wheel-drive car or a vehicle with a MacPherson strut suspension, a spring compressor is not optional—it is a mandatory piece of safety equipment. This tool slowly and evenly compresses the powerful coil spring, relieving the tension that holds the strut assembly together. Installing a strut without a compressor is one of the most dangerous things a person can attempt under a car. A failure of a cheap or makeshift compressor, or a sudden slip of the tool, can send the spring flying with catastrophic force. The process of carefully compressing, aligning, and securing the spring, then disassembling and reassembling the strut assembly, adds significant steps and points of failure to the job.
3. Tool and Equipment Requirements A shock absorber or strut replacement is not a basic hand-tool-only job.
- Essential Professional Tools: A robust floor jack and at least two high-quality jack stands are non-negotiable for safety. You will need a full set of sockets, wrenches, and pry bars.
- Specialty Tools: As noted, spring compressors are essential for strut jobs. You will also likely need a ball joint separator or a tie-rod puller to detach the steering linkage and a large breaker bar to loosen the large, incredibly tight mounting nuts that are torqued to the factory’s specifications to prevent them from vibrating loose.
- Impact Wrench: While not strictly necessary, an impact wrench is almost indispensable for breaking free the rusted and corroded mounting hardware that is common on vehicles that have spent years on the road. Manually breaking these bolts loose is often a test of strength and patience.
4. Vehicle-Specific Design and Access Manufacturers have their own ways of designing suspensions. On some vehicles, the shock or strut top is easily accessible through an interior trim piece. On others, you may need to remove the entire wheel well liner or other components just to get to the top bolt. Rust is a constant enemy; in rust-belt states, hardware can seize to the point where a standard wrench will round it off, requiring expensive cutting tools or professional extraction. This factor alone can transform a “simple” two-hour job into a weekend-long ordeal.
Section 2: The Step-by-Step Reality – A Guided Walkthrough from the Factory
To better illustrate the challenges, let’s walk through a general, simplified procedure for replacing a front strut assembly on a typical car. This is our manufacturer’s perspective on the “simple” job.
Step 1: Preparation and Safety
- Park the car on a completely flat, level surface. Chock the rear wheels. Engage the parking brake firmly. This is a baseline of safety that cannot be skipped.
Step 2: Lift and Secure
- Loosen the lug nuts on the wheel you will be working on before lifting the car. This prevents the wheel from spinning when you try to break the nuts loose.
- Use your floor jack to lift the vehicle and support it securely on a jack stand. Place the stand on a designated suspension or chassis point, never on the oil pan or subframe only. Repeat the process for the other side if necessary. Never rely solely on a jack.
Step 3: Disassembly
- With the vehicle securely supported, remove the wheel.
- Disconnect the brake line from the strut. This is a delicate operation; you must be careful not to bend or damage the metal brake line, which can be costly to replace.
- Disconnect the ABS sensor (if equipped) and any stabilizer bar links.
- This is where the physical challenge begins. You must now separate the ball joint from the steering knuckle. This is where a ball joint separator or “pickle fork” comes in. You must strike the knuckle—not the stud—to avoid damaging the boot of the ball joint, leading to premature failure.
- Once the knuckle is free, you can unbolt the strut assembly from its mounting points at the bottom and top.
Step 4: The Spring Compressor Dance
- Secure the complete strut assembly in a vise and attach the spring compressors, following the tool’s instructions precisely. You must compress the spring evenly in increments on all sides. Uneven compression can cause the spring to buckle and fail.
- Once the spring is sufficiently compressed and all load is on the tool, you can safely remove the large nut that holds the strut shaft and bearing plate.
- CAREFULLY and SLOWLY disassemble the assembly. The tension is now on the compressors, not on the nut. Keep your hands and face clear of the spring.
Step 5: Installation and Reassembly
- This process is the reverse of disassembly, but it is filled with its own set of pitfalls. You must compress the new spring, install the new strut assembly inside it, and reassemble everything. The torque specifications for all the mounting bolts and nuts are critical. Overtorquing can damage components; undertorquing can lead to component failure. The new strut shaft must be turned to a specific location to align the front end, and you must not let it rotate freely during installation, which can damage the new internal seals. After bolting everything back together, the brakes must be bled to remove air from the lines, a procedure that requires skill to perform correctly.
Section 3: The DIYer vs. The Professional – Weighing the Risks and Rewards
After walking through the process, it’s clear that answering “Are shock absorbers easy to replace?” depends entirely on your definition of “easy.” For a professional mechanic with a full service bay, a lifetime of experience, and all the right tools, this is a routine job. For the average DIYer, it’s a different story.
When DIY Might Be Feasible:
- Shocks Only: If you are replacing only shock absorbers that are easily accessible and do not involve a spring, the risk and complexity are significantly reduced.
- Mechanical Aptitude: You are comfortable with car maintenance, understand suspension basics, and have successfully completed complex jobs before.
- Access to the Right Tools: You have (or can rent or borrow) a spring compressor, a torque wrench, and other specialty tools.
- Ideal Conditions: You have a clean, safe, and well-lit workspace.
The Compelling Case for Professional Installation:
- Safety: This is the most important factor. A mistake with a spring compressor or a lifting jack can be fatal. Mechanics are trained to mitigate these risks every single day.
- Specialized Knowledge: A professional knows the quirks and common failure points of specific models. They understand how to avoid damaging components during disassembly. They know how to properly bleed brakes and perform a final alignment.
- Alignment is Critical: This is the single most compelling reason to go to a shop. As we have discussed in previous guides, changing struts or shocks dramatically alters the suspension geometry. A wheel alignment is absolutely mandatory after this job. The mechanic can perform the alignment as part of the service. A DIYer who skips this step will ruin their new tires, experience poor handling, and compromise safety. You will spend the savings from doing it yourself on a premature tire replacement.
- Warranty and Peace of Mind: Professionally installed parts typically come with the assurance that they were put on correctly. If a problem arises, you have recourse.
Conclusion: Redefining “Easy”
So, are shock absorbers easy to replace? From the factory floor, our answer is nuanced. The final task of bolting in the new part is trivial, but the entire process of removal, reassembly, and installation is fraught with complexity, danger, and precision requirements. It is a job where an “easy mistake” can have catastrophic consequences for your vehicle’s performance and, more importantly, for your personal safety.
For the novice or even the intermediate DIYer, the risks often outweigh the rewards. The requirement for expensive specialty tools, the inherent danger of dealing with high-pressure spring components, and the absolute necessity of a subsequent wheel alignment all point towards a job best left to the professionals. A mechanic doesn’t just replace the component; they perform the service correctly, safely, and with the expertise to ensure your car’s handling and safety are restored to factory specifications. True ease comes not from avoiding a professional fee, but from the confidence and peace of mind that comes from knowing the job has been done right.


One Response
It agree, very much the helpful information
——
https://the.hosting/ru/vps-vds-uzbekistan-tashkent